Welcome

Today’s adventure with the new Blogger
apparently will be:
*Why can I NOT get the format to change over to center alignment
instead of
left alignment?
*Why can I NOT assign credits to imported photos?
Well the new adventure didn’t last long as I am ALREADY FRUSTRATED.
 All kaleidoscopes by inkspired and KaleidoCam app.

Well the new adventure didn’t last long as I am ALREADY FRUSTRATED.
Back to blogging-
Let’s make some beautiful things while we enjoy the beginning (no matter how brief)
of Autumn.

I have been pressing flowers from my garden
before the early snows kill them off.
I use a microwave method using
the Microfleur kit.
I just love it!

The Microfleur basic set


 So Super Awesome, Pinterest
 Herbarium Boutique, Etsy
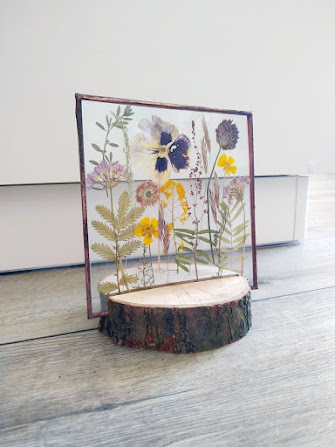
 Found on Pinterest, but no ID.
 PatsysPressedFlowers, sold on Etsy.

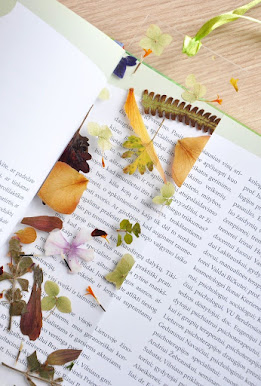
 My Booklandia, Pinterest

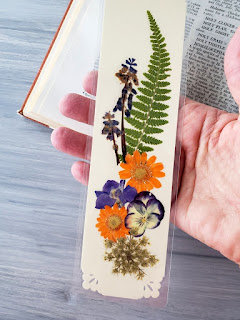
Notice the stitched border:

 rose.gold.silver, Etsy and Pinterest
 My Humble Jumble
It consists of 2 plastic plates,
2 clips to hold them together,
2 squares of thin cotton fabric
and 2 thick felt pads.

You lay out your flowers similar to above photo.
Make a ‘sandwich’ & pop into your microwave.
First burst: 10-20 seconds
Second burst: 10-20 seconds

A pressed flower design. Photo by Evelyn Ruhnke
I have never had to microwave longer than that.
Take your ‘sandwich’ apart carefully.
I then place the pressed flowers on paper towels
until I am done with all I am pressing for the day.
🌸🌻🌺
Because you are pressing in such a short time,
the colors are so bright and pretty!

From a set of notecards by VT Pressed Flowers, Etsy
Pressed flower framed art is also unique and beautiful.

Another framed arrangement by Evelyn Ruhnke
Don’t want to get that fancy?
That’s okay!
You can place your flowers between 2 sheets of plastic.
Use the sturdy plastic from the front of toy boxes,
or even from clear sheet protectors.
VERY lightly dab tiny bits of glue on flowers
and place on 1 piece of plastic with tweezers.
Tip:
It helps if you lay out your design
first, then glue.
🍂 🌾 🥀 🍃 🌼 🍁
Place 2nd piece of plastic on top. You can dab a couple of places on the top of the flowers,
then press 2nd sheet in place.
Finish with some pretty tape all around the edges to hold everything together.
Washi tape works, or ribbon that is 1” wide.
You will have to glue the ribbon folded over the edge equally to make it look nice.

Or
Cut your plastic into an oval, circle, etc.
Then use a sharp sewing needle
with the stitch set on long
and sew all around the edge.
A zigzag stitch looks pretty also.
Add ribbon hanger and place in a window.

I have also used copper tape
around the edges of a glass sandwich.
The glass was leftover from smaller frames
where I did not want to use the glass.
(Notice the simple & clever stand below?)
Another example of flowers
displayed between panes of glass:

ForgetMeNotNature, Etsy
Let’s not forget stationery!

Possibly My Humble Jumble, Etsy
Making beautiful notecards is so easy with
pressed flowers and leaves
as God through Nature does all the work for you!
Simply take cardstock,
cut and folded to your desired size,
and lay your pressed items
in a pleasing arrangement.
Dab on glue.
Add glitter glue, paper die cuts, lace,
bits of ribbon-
anything that pleases you,
trying to stay with flatter objects.
Happy? Glue in place with dabs of glue.
My friend S.N. uses an old cd as her palette,
and squirts a little blob of glue on it.
Then taking a toothpick she picks up
dabs of glue and glues her items.

A gorgeous one-of-a-kind card to send!

Card by Original Garden. She has an Etsy shop.
The last pressed flower/leaf craft
I would like to share with you are
BOOKMARKS!

Do you have some old, falling apart books
stuck in a corner or box somewhere?
This is a lovely way to use a few pages
from books headed to the recyclers..

Cut pages into bookmark shape.
Back with sturdy cardstock, but nothing too thick.
Glue to pre-cut page.
Punch a hole at the top.
Lay out your pressed flower design;
sparingly glue in place.
Brush 2-3 light coats of Mod Podge over all.
Let dry 24 hours+ in between coats.
Thread ribbon/yarn tassel through punched hole at top.
Or
Cut clear contact paper into 2 bookmark shapes,
with one being slightly larger.
Peel off backing from the first one,
and place dried flowers on the sticky part.
Carefully place sticky side down of
second slightly larger piece,
and smooth with a brayer,
rolling pin or smooth sided bottle.
I like to do this on a thinnish shop towel,
to help protect the pressed flowers.
Trim excess contact paper.
Punch hole in top for tassel if desired.

Brit Morin, Pinterest
Here are some more ideas to inspire you.

My Humble Jumble, Etsy & Pinterest

Craft, DIY Decor, Gift, Sew and Party with Tip Junkie, Pinterest

I hope you are able to try out the
Microfleur flower press.
(No paid endorsements, I just really like it!)
If not, get out that old telephone book
and start pressing!
‘Til next time,
inkspired