Welcome!
All kaleidoscopes by inkspired and KaleidoCam
‘The cure for boredom
is curiosity.
There is no cure
for curiosity.’
- Ellen Parr
We are now under severe restrictions
on our ability to go where we want,
do what we want, see who we want.
Many people have already been under ‘house restrictions’
for a week or more.
Patience can get frazzled.
Artist Sandra Boynton
Tempers may be elevated.
Minion humor
And then there are the kids!
They are stressed out too!
I hope you will come away from today’s blog
with a few ideas to relax everyone,
use that creative side of the brain,
and just have some good ‘ol fun!
Let’s start out today with a couple more
Painting Projects:
Painted Swirly Flowers
From an article in Make and Take
You will need:
Some kind of palette-
plastic lid, watercolor tray, plastic plate
plastic lid, watercolor tray, plastic plate
Paintbrush
Paper
Acrylic paints, various colors
Acrylic paints, various colors
Suggested-
drop cloths, paint ‘smock’ or old shirt
From Make and Takes, 2016 article
How to:
Pour a few colors of paint onto your palette.
Take a paintbrush and dip into one color.
Without rinsing, dip into a second complimentary
paint color.
Do not blend!
Make a large circle ‘swirl’ on your paper,
Making it into a swirl shoe.
Reload your brush with paint.
Making it into a swirl shoe.
Reload your brush with paint.
Make another next to it.
If you would like your flowers to have
slightly different ‘tones’, try another swirl
without reloading your brush with fresh paint.
slightly different ‘tones’, try another swirl
without reloading your brush with fresh paint.
Swirl in a third circle.
(Refer to photos)
Made-by-mejulie-ryder.blogspot.ru
Using a largish brush, or a sponge cut into a thin leaf shape
Load with 2 or 3 colors of green paint.
Using a swiping motion add in some leaves.
(Refer to photo)
Load your brush with the flower colors (2)
and use a short quick ‘swipe’ to make flower buds.
Take a small paint brush and load
with a light color value of your flower colors.
Add in a bit of detail/highlights.
Here is a finished example,
with some slightly different ‘tweaks’.
Copyright Julie Ryder
Almost done!
Using a small paintbrush
dab black or very dark flower color
to center of each flower.
Using the end of your paintbrush
dip into white or yellow and make 3 dots
in the very center of your flower.
Here is another example to inspire you!
Using a small paintbrush
dab black or very dark flower color
to center of each flower.
Using the end of your paintbrush
dip into white or yellow and make 3 dots
in the very center of your flower.
Here is another example to inspire you!
Sorry, the credit for this was in Russian!
For young artists,
have them dip a finger into a thin layer of paint.
Then press their finger around the colored swirl.
Voila!
You now have a bouquet of flowers with leaves!
As you can see, your flowers can be very simple
or look more elegant
Depending on what you ‘add’.
Next painting project:
DOTS!
ChristysCornerStudio.com
Dots are simple and any age can make one.
The more skilled the artist,
the more complex designs you can use.
Let’s start with a simple project:
YouandKids
You will need:
Paper - plain, watercolor or mixed media
Colored markers, any size, any brand
Post-It Notes
Pick out a simple shape -
look at preschool age coloring books
for some shape ideas.
To start, make your shape solid with no inner cut out areas.
Using your Post-It notes, cut the shape out.
You can patchwork the notes together so you have a large enough area for your shape.
Be sure to have as much of the ‘sticky’ area
on your pattern shape as possible.
Smooth your shape onto your paper.
The sticky areas should hold it in place.
Now take the main color marker and start randomly making dots on your paper. Concentrate more dots around your shape, with fewer dots out to the edges.
Posted on Pinterest by Srirup
Take a complimentary colored marker and make more dots.
When you are pleased with the color balance,
and the edges of your shape are mostly covered
you are done!
Carefully peel up your sticky note shape.
😁
The above photo shows using paint with pencil erasers.
This works really well!
You can also use Q-tips (cotton swabs),
pen caps, dowels - just look around for round shapes!
I think using acrylic paints is much easier than dotting with watercolors, but experiment with what will work best for you, and/or the ages of the kids creating also.
Here’s another design variation,
same technique:
Posted on Pinterest by Rachel Hinderliter
Starting to have some dotty fun?
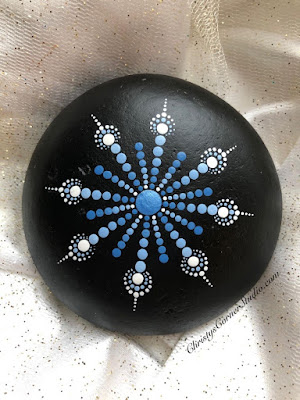
Try using acrylic paint dots on rocks!
For sale on Etsy
Try some dots on thick card stock and make bookmarks!
ShopWorldLove
I hope you try some Dot Art,
and really have fun with it.
That’s it for today’s Boredom Busters.
‘Til next time,
inkspired
Truth, usually experienced before 10am or coffee-
Nothing is kept in the plate cupboard
except plates.
Not coffee, silverware, napkins or mugs
can be found in the plate cupboard.
Just. Plates.


No comments:
Post a Comment