Showing posts with label zentangle. Show all posts

Wednesday, January 28, 2026

Got the Winter Blues


Welcome!

It was 2 degrees Fahrenheit last night.

Brrrrr…it also snowed a couple inches…brrrr…

Today it got up to 42’ and a lot of the snow is gone now. Typical Colorado weather. 

It’s giving me the Winter blues. So, how about I share some of my favorite blue things with you? Let’s go!


Jellyfish. Way cool creatures. Fascinating shapes and colors, each one uniquely beautiful.

Teacups. Can’t get enough of them! This one has a moriage technique with raised areas in the design. Typically you will see this with dragon motifs.


One of my original zentangles that I have then used an app to manipulate the colors. I can get some pretty wild looks doing this!


My hand painted rock flowers. I love putting them outside around my garden areas, in all colors of the rainbow.


Kaleidoscopes made with my camera and an app called KaleidaCam. I am totally addicted…


Artwork about tea time. These fit in with my love of teacups, I’m guessing.


I love making cards to give to people. I have been doing this for over 40 years. Wow. My styles, techniques and overall quality have morphed and changed through the years, as they should. I continue to learn new things! I love to experiment with embellishments and supplies. This card uses a background technique called Polished Stone. Way. Fun.


This is an app called Word Pack. I can type in whatever words I want, choose one of their pre-set shapes and color groups, and come up with one-of-a-kind word art.


I enjoy seeing what other people collect. We human beings can be very strange in our likes and dislikes! While I may not want to collect dead bugs, it’s fun to see a well done collection of them. These blue vessels are very attractive.


My Collage Art Dolls continue to be a happy time for me. I use all recycled junk mail, catalogs, flyers, magazines - anything headed for the trash.


These snowflakes were cut on my Cricut machine. I LOVE my Cricut! Making custom ornaments is so easy with it. And it uses paper and cardstock of which I have an over-abundance of. 


This is one of my Iris Fold technique cards made with recycled gift wrap paper. Wrapping paper comes in soooo many beautiful colors and patterns. This is a great way to use up those leftover bits. I used to cut the openings by hand with an Xacto knife. Now I use my Cricut.


Just have to add in another snowflake photograph. Did you know there are NO identical snowflakes? Mind boggling. I cannot imagine that level of creativity. Says alot about God, don’t you think?


For this card I used a metal die and ran it through my Spellbinders Platinum machine. This is another machine I use very frequently. I used to be frustrated with dies not cutting well, or too difficult to crank through the pressing bars. Then my friend showed me her Spellbinders Platinum and I’ve been hooked ever since! The background is Polished Stone (see above).


This is a double pour glass pitcher made by Blenko. If you are ever in West Virginia and close to the Blenko factory - go! They have a seconds gift shop in the front where you can purchase beautiful hand blown glass items at very low prices due to some ‘flaw’.  We were there many years ago and also got to go on a tour. Not sure if they still do that.


This is a digital manipulation of a photo taken of my garden. Columbines are the state flower of Colorado. Blue ones that is!


I did not make this lovely example of quilling. I love the way it looks. I do not have the patience to do this paper craft! I still enjoy others work however.


Nudibranchs are fascinating, tiny ocean creatures. They were ‘discovered’ not so long ago, and since then they are still discovering new types! At first they thought they were a kind of sea slug. Then the scientists realized no, these little guys are their own species. Nudibranchs are absolutely beautiful. Just think, for centuries they have been living and dying and no one but God knew about them. He created them for His own pleasure. Again, unbelievable creativity! Truly, our God is an awesome God.


This bracelet pattern is what got me back into beading after many years. A friend taught me the pattern, and I have made several. After a few years’ break, I am back to beading again, and you guessed it - I’m beading a bracelet with this pattern!


What is it about gingerbread houses that I love? Perhaps because of the huge variety of decorations you can use to customize your own. I did not make this one. I am simply an appreciative fan!


I find vintage song sheet art to be a wonderful inspiration for me. You can find hundreds of examples on the Indiana Music Library site, in Harmony.

Are you feeling the Winter Blues, yet?


This is a purchased large letter ‘S’ covered in recycled jewelry pieces. I am saving up broken pieces of jewelry so I can make one of these someday. Think I will pick the letter “K” however…


This is one of my very first papercuttings. I used construction paper, as that is what I had at the time! I received the book Chinese Papercutting one Christmas and was fascinated by it. Since those first crude cuttings I have continued my love of papercutting of all kinds and from all nationalities.


Here is another papercutting I did, many years later!


Kaleidoscopes and quotes - doesn’t get much better!


I have downloaded so many wonderful free apps from AppAdvice. One of the best apps ever. The seahorse is a Zentangle original drawing of mine that I then used a photo app to manipulate. Love the colors.


My Collage Art Dolls are just so fun to make. Of course I have many mermaids, and the ocean is all shades of blue, so they fit right in for today’s blog.


Did I mention I love mermaids? :) and I love making cards? and I love my Spellbinders Platinum?


There’s just something so creative about doors that are…different. I love painted ones, and doors with interesting door handles, or windows in them.


I bought a rock painting book by Lin Wellford. Oh my! Totally addicted to painting rocks now! I especially love painting little cottages and shops.


Vintage beaded gowns - a lost art today. Can you imagine the hours that went into this dress to hand bead all those tiny beads? (They were also pretty heavy with all those beads!)

These winter blues are inspiring me to go make something…blue! How about you?


Iris Fold technique Cinderella dress I made with my Cricut and scrapbooking paper scraps.


Yes, playin’ with my apps again and an original drawing. Zentangles are so relaxing to do.

Time to close!


‘Til next time,
inkspired

Pinterest: K.Kloberdans


Thursday, March 13, 2025

Shamrock Shenanigans

 Hello!

Card by inkspired, with hand inked ‘Polished Stone’ background


Let’s have some Saint Patrick’s Day Shamrock fun!

Found on Pinterest

 Did you know a shamrock always and only has 3 heart shaped ‘leaflets’?
I didn’t!

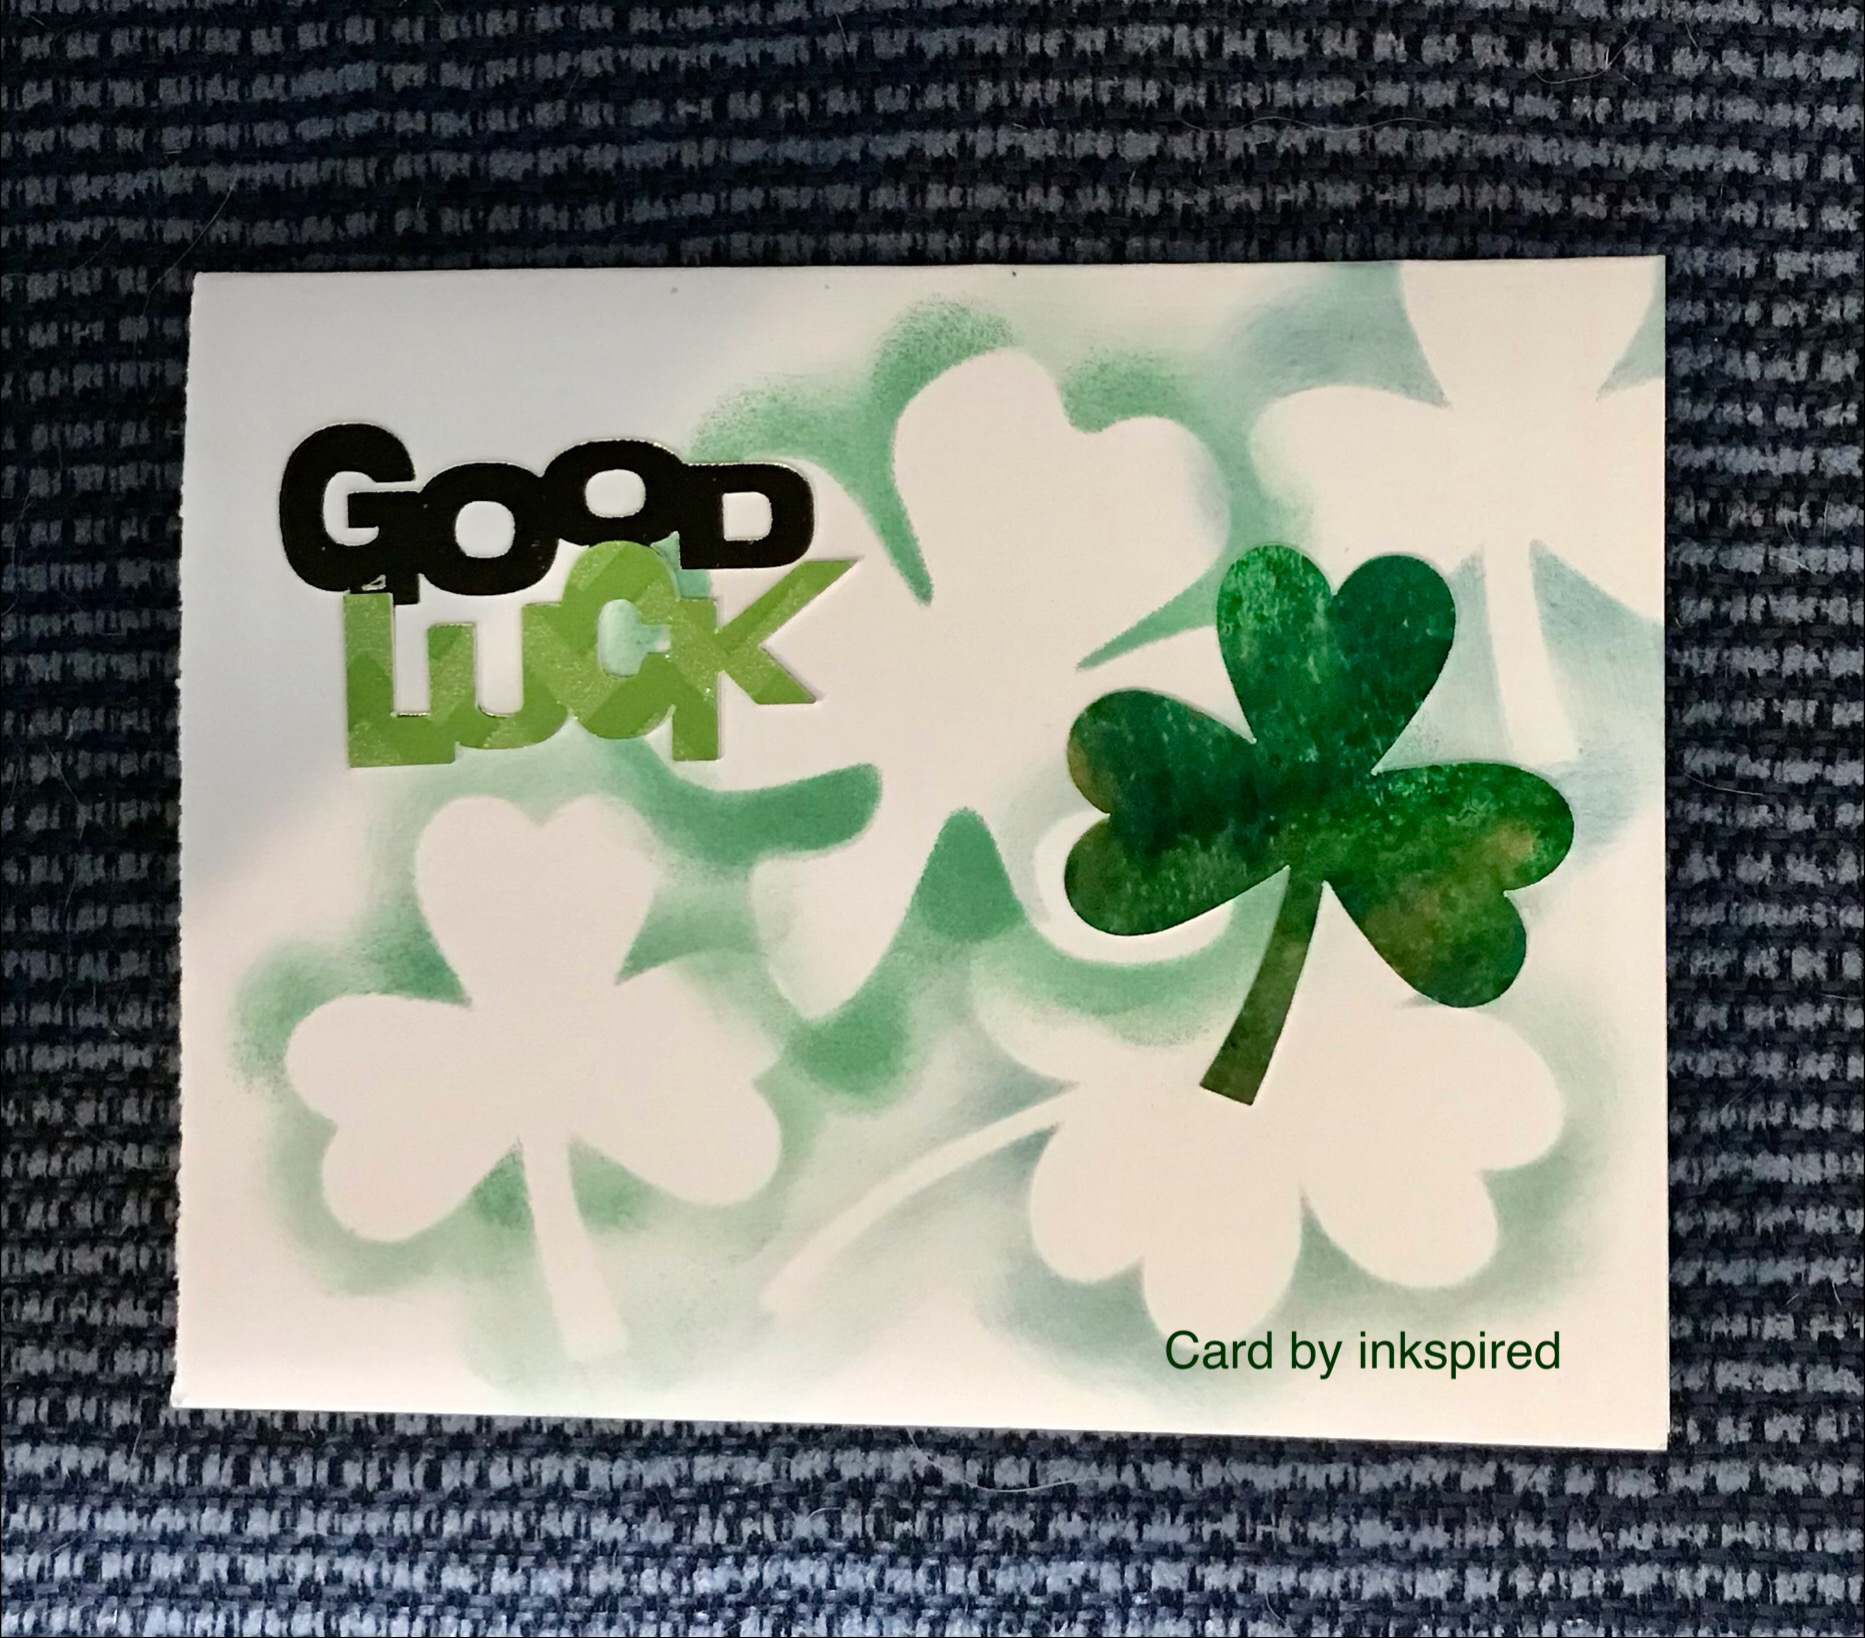
Card by inkspired, with Polished Stone background

A clover can have 3 or 4 ‘leaflets’, but they’re not always green!
Clover comes in white and purple too.
I didn’t know that either!

Here’s a fun Shamrock maze:
Best Coloring Pages, Pinterest

Here’s a fun 4-leaf clover puzzle!

TheTypicalMom.com

4 leaf clovers are found 1 in 10,000 give or take a few dozen.
So if you find one, you are considered lucky!
Here’s a fun way to add some ‘luck to your room -

Poshmark

Spiral Shamrock spinners

Cut a 4-6” circle. Starting at one edge, cut in a spiral design to the middle. Cut out a 4 - 6” shamrock or 4 leaf clover from green cardstock. Write message in white or gold pen. Attach Shamrock to one end of spiral card. (Glue, staple or tape). Attach other end to the ceiling.

Here’s another Spinner idea:

CraftCornerDIY

Use the same basic directions, only use a much larger piece of cardstock for your base circle. Attach several shamrocks to each spinner from top to bottom.

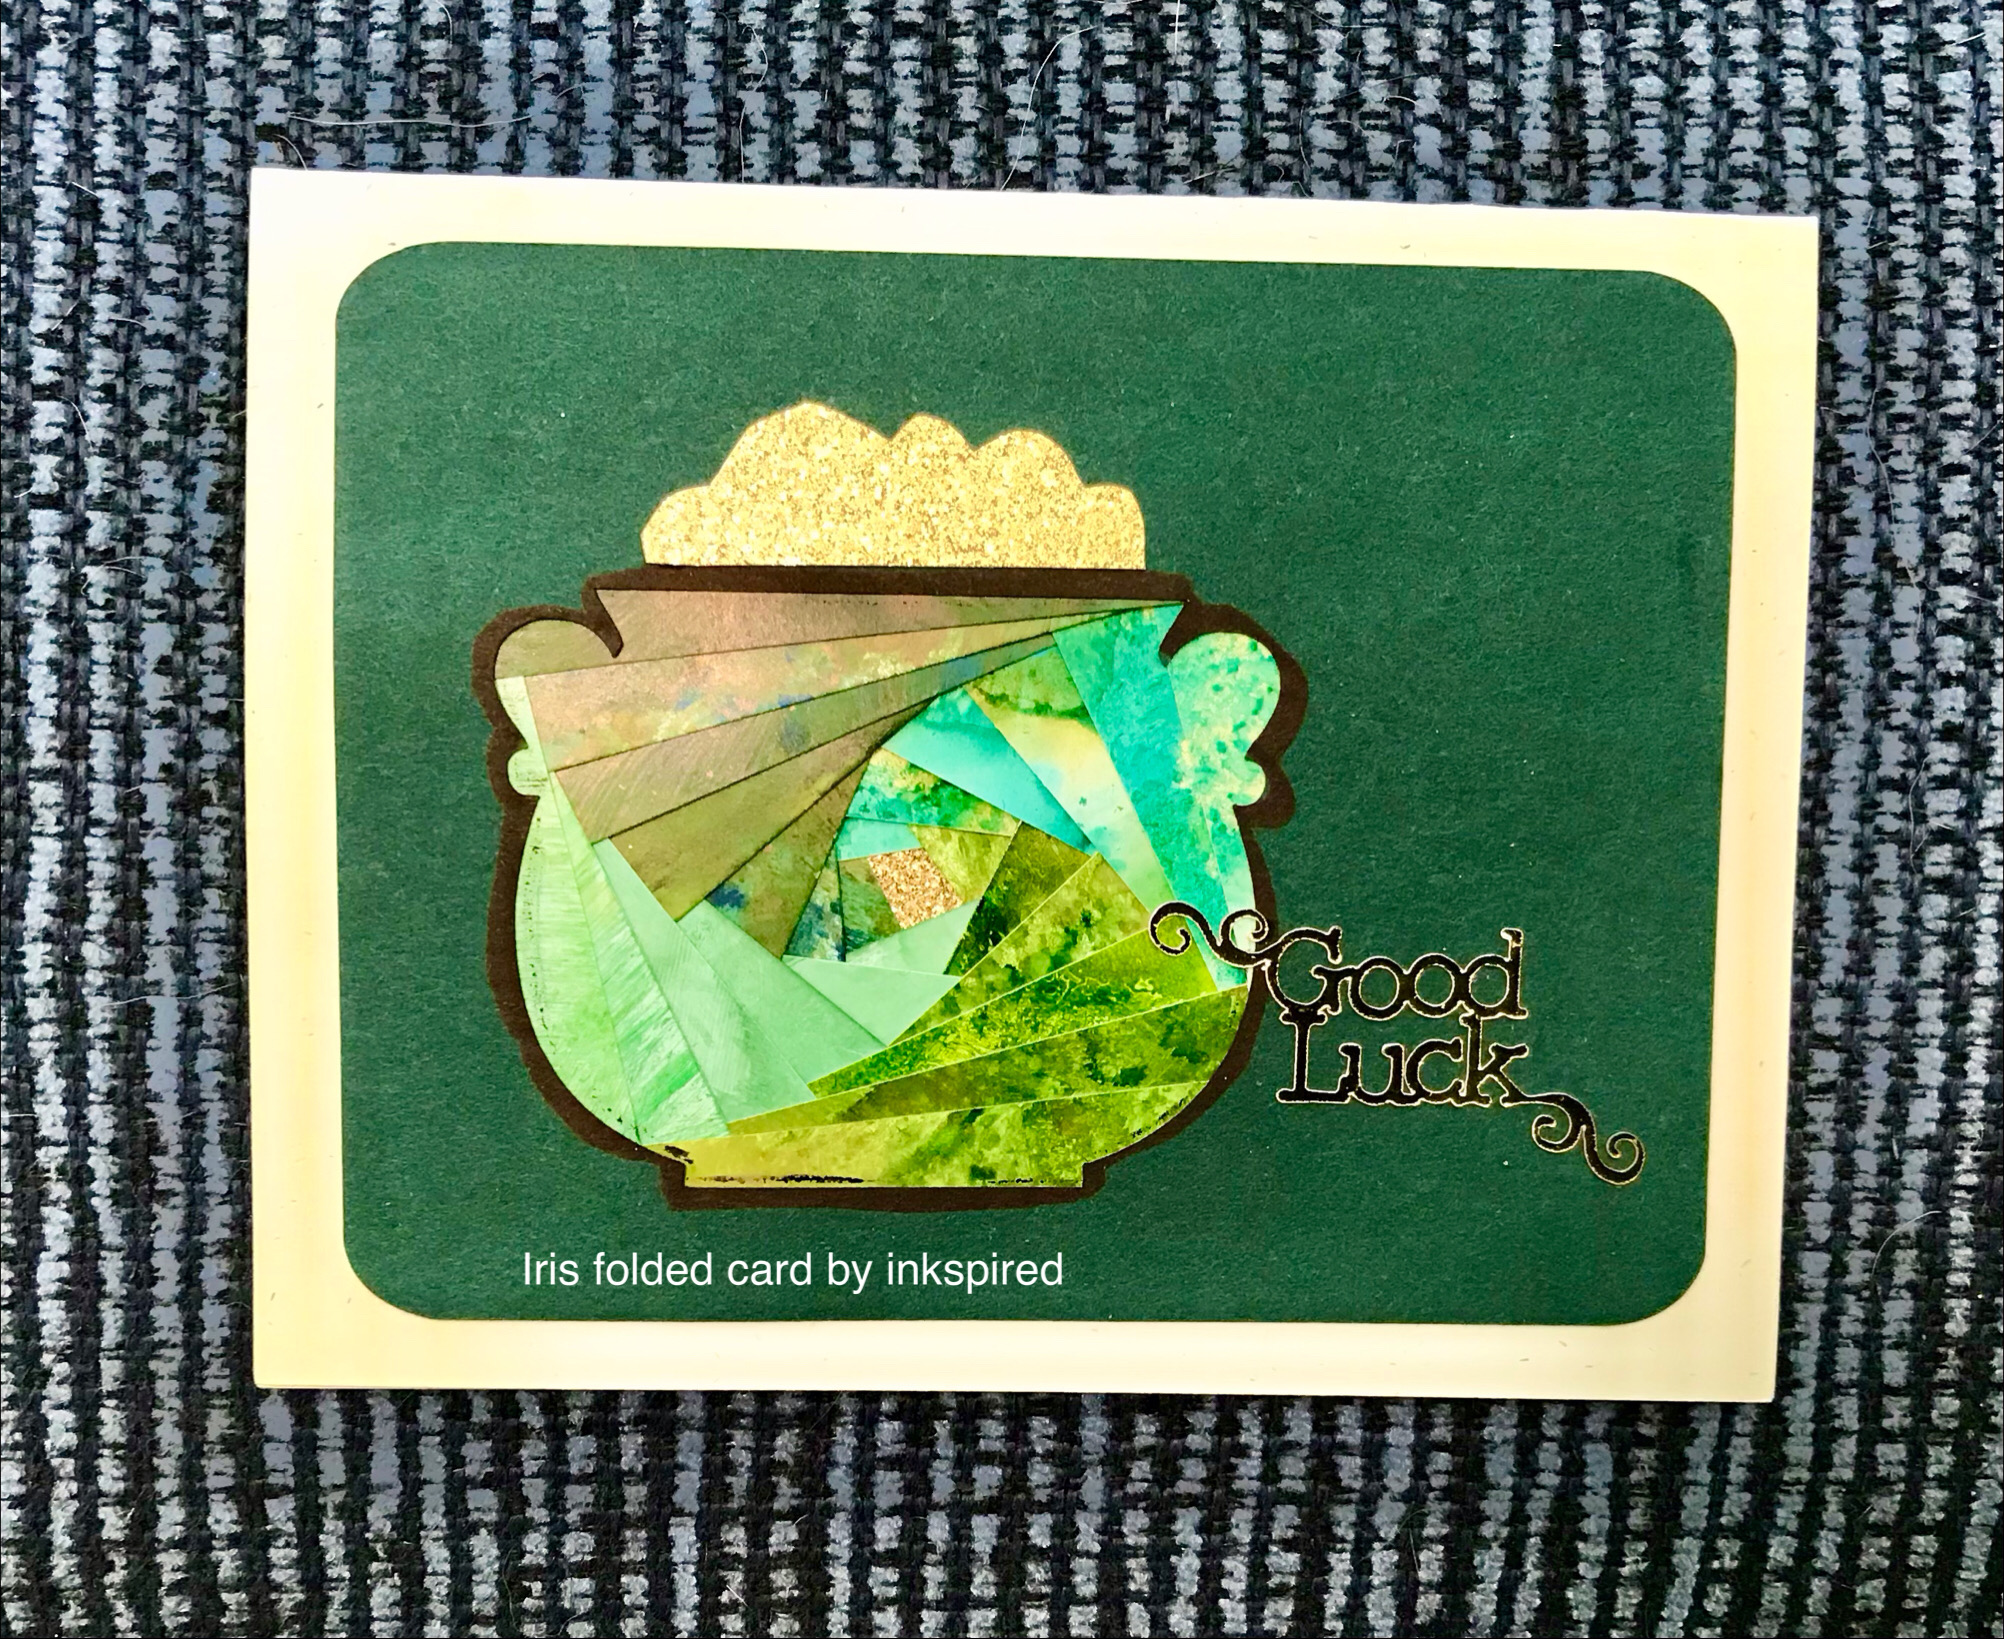
Iris Folded card by inkspired

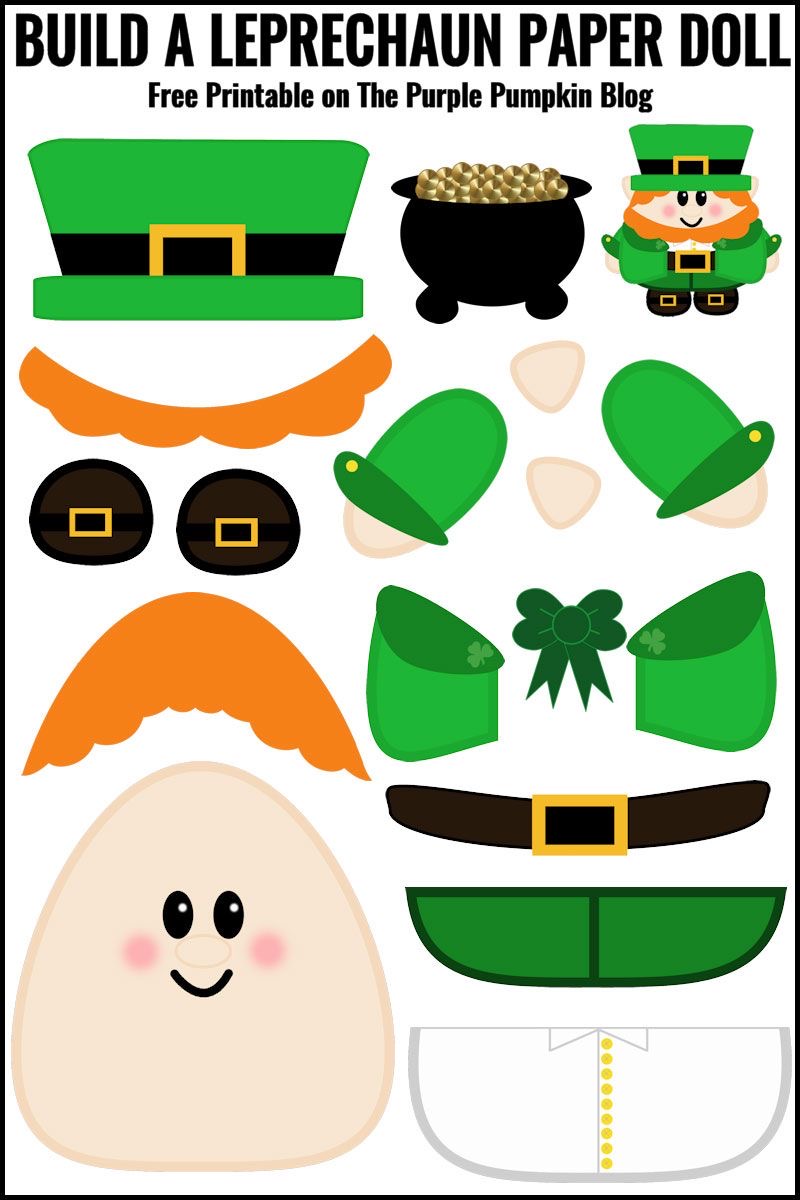
Here are a couple leprechaun puppets you can string together either with string, brads or eyelets.

Leprechaun Puppets

Artwithcrystal.com


ThePurplePumpkin blog

Next I have for you some 
Recycled Postage Stamp Wall Art.


On a blank piece of paper, cardstock or poster board draw a shamrock lightly in pencil. Make it as large as you want. 8” can be a good size to start with, and easily framed.
Sort through a bag of used postage stamps. Pick out all the ones that are primarily green. Arrange on your shamrock shape. Set aside. Brush on about 3” x 3” square inside the shamrock shape with glue or Mod Podge. Press stamps into glue. Continue with small sections until the entire design is covered. You can finish coat it with a layer of Mod Podge or clear acrylic spray.
You can do this with any shape, any holiday pretty much!
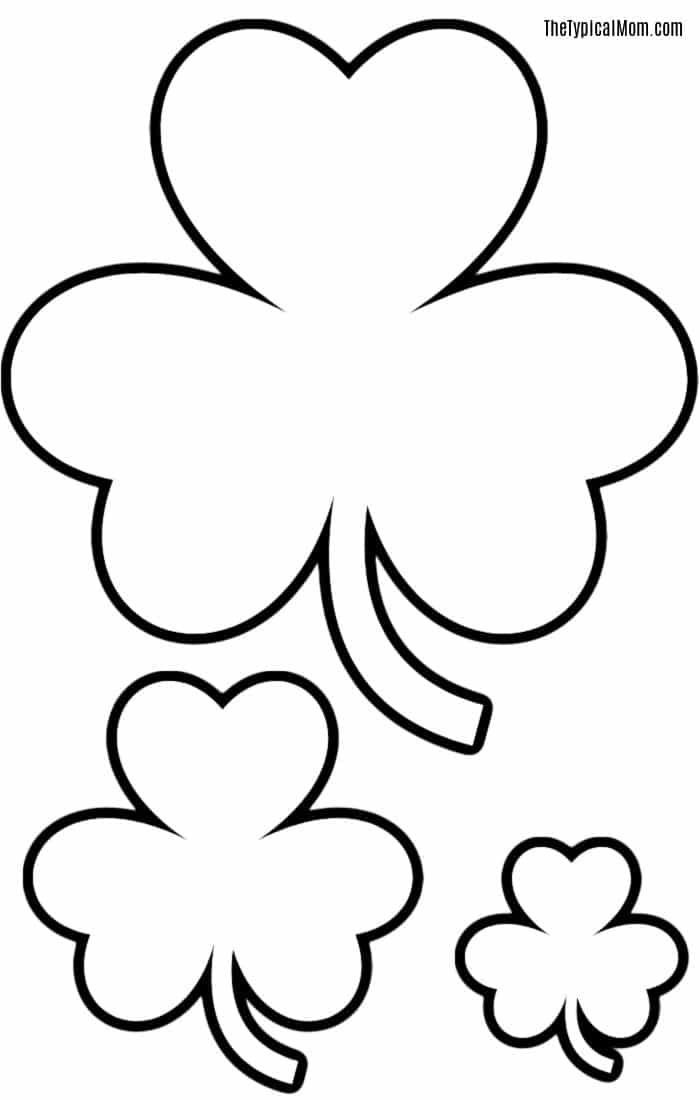
Here are a few shapes to help you -


TheTypicalMom.com
 
Winterandsparrow.com

You can use these basic shapes for lots of different crafts.

Fabric Sachets & Pillows

Cut 2 from fabric and 1 from batting. Sew together, insides out, with a 3/4” seam allowance, leaving a 1 - 2” opening. Turn right side out. Stuff with batting and hand sew closed.

Depending on the size you now have a decorative pillow, or a scented sachet for your drawers (add a few cotton balls soaked in fragrance oil inside of batting, or use fresh herbs in a net pouch, inside of batting.

Betty Home Decor, Etsy 

Shamrock Pins

Make them smaller, sew on a pin to the back and you have cute pins to give all your friends.

Cut them a tad larger and catch a piece of braiding or ribbon in the seam, to form a loop. Attach a clip and you have a cute accessory for your backpack or purse.

Card by inkspired

Fun Fact:

McDonald’s Shamrock Shake 

is 55 years old!


If you have followed me at all, you know I have a love affair with beads. Here are a couple bead patterns to make:

Bead earrings and bracelet

I believe this is from PandaHall.


Kandi Patterns

Fun Fact:
The 1st USA St. Patrick’s Day parade was held in Boston in the 1760’s!


I found 2 similar versions of tissue paper suncatchers, so I’m posting them both.

Tissue Paper Suncatchers

CraftCornerDIY


munchkinsandmilitary.com

Cut out 2 shamrock shapes. If you have a Cricut it works great for this project.

Lay 1 shape on top of sticky side up sheet of clear contact paper. Next is the fun part. Start placing tissue paper shapes on top of the sticky contact paper. Shades of green and yellow are perfect. When your shamrock is full place 2nd shamrock outline on top, and finish with a second sheet of contact paper. Trim edges. Hang where the sun can shine through it.


Here are a couple more games:

HOMEMADEHEATHER.COM
CuteColoringPagesForKids.com


These pipe cleaner shamrocks are fun to make, and you can tuck them all over the house for a touch of whimsy:

Beaded pipe cleaner shamrocks

Onelittleproject.com

Cards with Polished Stone hand-inked backgrounds by inkspired


Fun Fact:

9% of Ireland’s population are redheads.


Here is a clever use of paper mache’ letters and pennies:

Lucky Penny Letters

Marzipan.com
Spray or brush copper paint onto paper mache’ letters. Doing a small section at a time, spread glue or Mod Podge generously on dried surface. Place pennies in rows. Alternate ‘heads’ or ‘tails’ as desired. Let dry. Finish with a couple coats of Mod Podge to seal.


So why Ireland and shamrocks and Saint Patrick?
Saint Patrick was a captured slave at age 16, in the 4th century. After 6 years he escaped and returned to Great Britain. He then went back to Ireland as a Roman Catholic missionary.
It is said he used the common shamrock to illustrate the Holy Trinity of The Father, The Son and The Holy Spirit.

Digital art by inkspired

Let’s make some garlands to decorate the house and classroom.

Shamrock Garlands


Irish flag colors garland
This simple garland is cut in the colors of the Irish flag.
Cut shamrock shapes from white, orange and green paper. String with baker’s twine or heavy thread or string. You can glue the shamrocks on, or punch holes and thread them onto the string. You could even tape them in place.

Book Page Banner

Homeroad

Use pages from a damaged book. You can run these through a color copier and print a shamrock on each page. You can also use a Cricut machine to cut out shapes from either paper or fabric. Glue these shapes onto the book pages. Finally, you could also use a stencil and acrylic paint to paint a shamrock on each page.
Fold the top of page over 1 inch. Sandwich a string in between folds and glue in place.

Fun Fact:
Ireland has no snakes, moles or weasels!

Vintage card

Next I have an inexpensive door wreath:

Puzzle Piece Wreath

Dollar Store DIY

You will need a jigsaw puzzle, acrylic paints, a paint stir stick, cardboard, scissors and glue. Optional ribbon for bow and hanging.
Cut cardboard in shape of shamrock. Paint puzzle pieces a variety of shades of green. Snip end off paint stick, and paint in rainbow colors. Layer puzzle pieces on top of cardboard cutout shape. Glue in place. Continue layering and gluing until you have several layers deep. Glue paint stick rainbow in place. Seal with acrylic spray sealer or Mod Podge. Add ribbon bow if desired. Attach ribbon on back for hanger.

Card by inkspired

Here is another great 4 leaf clover bead pattern:

PandaHall.com

Fun Fact:
Hallmark printed the first St. Patrick’s Day postcards of shamrocks 1910-1915.


These clothespin leprechauns I thought were pretty cute. Put a pin back on them and you have a great St. Paddy’s pin. Add them to a wreath. Glue a dowel or chopstick to the back and use as a plant poke or seasonal addition to a flower arrangement.

Clothespin Leprechauns 

I wish I knew who to credit this idea to.

You will need wood clothespins; a couple colors of green acrylic paint; felt scraps in green, yellow and black; a scrap of reddish brown yarn and glue.
(I like Aleene’s Tacky Glue).
Follow the photo for ideas of colors and felt placement.
A tiny silk shamrock tucked into the hat band would look super!

Found on Pinterest

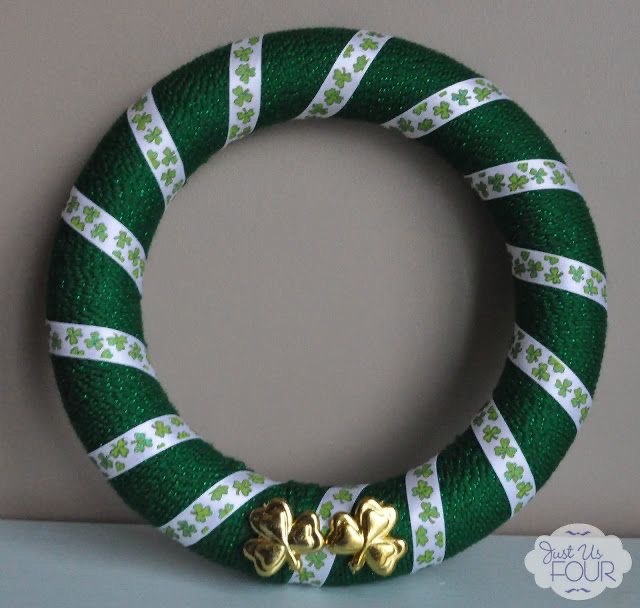
This next wreath works up quickly and is super easy. You can add more decorations to it as you want. Sometimes plain and simple are the best, though.

Ribbon wrapped Wreath
Just Us Four, Pinterest

You will need a styrofoam wreath and 2 kinds of ribbon; glue and straight pins.
You could also use crepe paper to cover the wreath base.
Using a straight pin, pin beginning of base ribbon (or crepe paper). Start to wrap around wreath form, being careful no styrofoam shows through. End by pinning tail in place. Now go back and carefully lift ribbon at beginning and glue in place. If it looks like it doesn’t want to stay, use a pin to temporarily hold until glue is bonded. Repeat at end.
Start thinner, decorative ribbon in same way, wrapping more loosely. Glue both ends, tucking under ribbon so end cuts do not show.
Attach decorations with glue, holding in place with straight pins until glue is bonded.  Add a ribbon loop to the back, gluing and tucking ends under.
(A heavier glue like Aleene’s Tacky Glue is essential for this project.)

Vintage sheet music, c.1911

Fun Fact:
The Chicago River has been dyed green every St. Patrick’s Day since 1962.

Here is a nice pattern to make a felt 4 leaf clover. Add these to a hat band, a lapel or decorate the above wreath with a cluster of them.

Felt 4 leaf clover
Molly and Mama


Did you know you can use your Cricut machine to cut felt?


Zentangle art
Use a simple outline of a shamrock or 4 leaf clover. (See above). Fill in with Zentangle doodles. Color with colored pencils if desired. Here are some samples of what I did:

Original Zentangles by inkspired


Here is a cute leprechaun to color:

Christina’s Creations

Fun Fact:
Several of the original Apollo astronauts carried clovers with them for good luck.

I hope you are inspired to try a few of these projects. Crafting is a great way to lower blood pressure, exercise a different part of your brain (which helps prevent dementia) and make a ho-hum place fun to be around. It is also a perfect opportunity for multiple generations to interact positively.


‘Til next time,
inkspired

Kaleidoscope by inkspired and KaleidoCam