Siochain
(Gaelic for 'peace')

Dun Dealgan, Ireland
Saint Patrick's Day is coming!
When?
Soon!
How Soon?
Very soon!!!
(slight paraphrase from an hilarious scene in 'Romancing the Stone')

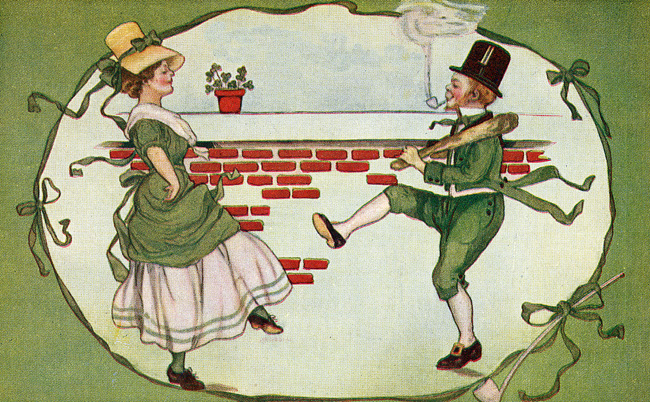
vintage graphics

c.1869
(c. means 'circa', or in this case I use it for 'copyright')
For today, we will celebrate a wee bit of blarney to start off our countdown to
St. Patrick's Day!!

vintage clip
Now, is that a leprechaun,
or just a little boy?

vintage clip
I'm sorry, I don't have any 'where I found this' addresses for most of my vintage Irish clip. If it is 'yours', let me know and I will give credit where it is due.
They have added some really fun features,
and it is an extensive interactive web site now!
I downloaded some Barbie Around the World Adobe Reader docs.
Unfortunately, I have no idea how to pass these on to you.
So,
I recommend you go to the site, sign in, and just play!
The one I suggest for today is
"Printable_Ireland Barbie around the world.pdf"
Next up I have two beaded safety pin patterns for you:


If you can't remember how to do safety pin beaded pins, just do a search of my blog for 'safety pin tutorial'.
You also can do a search for other fun safety pin beaded pins patterns on previous blogs,
by typing in 'safety pin pattern'.
Here's another one, with not so much blarney!
The flag of Ireland:

It is a tradition here in the United States that everyone has to wear a
bit 'o green on St. Patrick's Day. If you are caught with NO green,
then you get pinched!
After a couple of pinches, you are ready to pin on ANYTHING green!!
These adorable little safety pin pins bead up very quickly.
Why not make several to share with your office mates?
Or your friends at school?
Or the neighborhood kids?
:0)
Here are two recipes I found at Better Homes & Gardens:
Corned beef and cabbage crock pot
Better homes & gardens recipes
Ingredients
· 1 3- to 4-pound corned beef brisket with spice packet
· 1/2 small head cabbage, cut into 3 wedges
· 4 medium carrots, peeled, and cut into 2-inch pieces
· 1 medium onion, quartered
· 2 medium yellow potatoes, cut into 2-inch pieces
· 1/2 cup water
Directions
1. Trim fat from meat. If necessary, cut brisket to fit into a 5- to 6-quart slow cooker. Sprinkle spices from packet evenly over meat; rub in with your fingers.
Place cabbage, carrots, onion, and potatoes in the slow cooker. Pour water over vegetables. Top with brisket.
2. Cover and cook on low-heat setting for 10 to 12 hours or on high-heat setting for 5 to 6 hours. Transfer meat to a cutting board. Thinly slice against the grain. Serve vegetables with a slotted spoon. Makes 6 servings.
Irish Coffee:
ingredients
· 1-1/2 ounce Irish whiskey (3 tablespoons)
· 1 tablespoon brown sugar
· 1 cup brewed coffee
· 1 tablespoon whipping cream, slightly whipped
Directions
1. Pour whiskey into a 10-ounce mug. Stir in brown sugar. Add coffee; stir until sugar is dissolved. With a spoon, carefully dollop whipped cream so it will float on the surface of the coffee. Makes 1 - 10-ounce serving.
Sorry about the kinda' weird fonts and all,
that's how it translated when I copied/pasted!
Oh, the mysteries of fonts and spellings and text sizes and colors....
sigh.
One of my favorite vintage magazine covers:

Actress Colleen Moore has a fascinating life story....for another time.


Print these out on sticker paper to give out to any child that passes your way!
Or to give out to any adult that passes your way...
You could also print them out and make cute little cards.
Frame the printed graphic with borders of cardstock:
Green
Yellow Green
Orange
Gold
It's easy to do! Your first color is cut 1/8" larger than your clip art. Glue to back.
Your second color of cardstock is cut 1/8" larger than the 1st color layer.
Glue to back.
You can repeat as many times as you wish, but 1 - 3 layers is typical.
Place onto a solid color cardstock - any of the above colors that you didn't use would work great.
You could also easily use a white cardstock as your base.
Hand print a little
"Happy Saint Patrick's Day"
on the inside, or purchase/print out phrases to your liking.
Glue inside.
Voila!
You have cute cards to pass out on a fun Irish Day!
Bonus extras: On the front -
Add a 1/8" or 1/16" ribbon bow to a corner.
Glue on a green, white or gold button to a corner to accent.
Dab little sparkle glue dots to accent. (Stickles are fun to use!)
Another idea:
Why not print out and glue one of the above cute leprechauns to the front of cardstock, as suggested above.
Then, on the inside of the little card,
punch 2 small holes horizontal to each other.
Next pin on one of your themed safety pin beaded pins through the tiny holes.
You now have a really darling little card-with-gift to give.
(And no one needs to know it didn't take any time at all to make!)
If mailing, I would use a padded envelope so the safety pins don't
'sproing' in the mail.

"Better fifty enemies outside the house
than one within."
- an Irish blessing

Dun Dealgan, a castle relic from ancient Ireland
Now, go buy some green socks....
inkspired