Showing posts with label iris folding patterns. Show all posts

Thursday, December 26, 2019

Head Start for December, 2020

Welcome!

Kaleidoscope by inkspired 

Did you feel so rushed in the last couple of weeks?
Were there decorations you didn’t have time to finish?
Did you plan on sending handmade cards,
 but only had 3 to send?
Are there handmade gifts you had hoped to give,
but there wasn’t time to complete?

No fear!
It’s not too late dear!
For 2020 holidays that is!

By Kathy Hering

I want to inspire and encourage you today.
Start with making a list,
itemizing what you would like to have done for 2020.

My list looks something like this:

Make a list of friends & family.
Make Christmas cards for all on my list.
Start an idea list of gifts.
Complete and frame 1 holiday papercutting.
Finish paper nativity set.
Choose color/theme for 2020 Christmas tree.
Start homemade ornaments for tree.

 A fairy peek-a-boo box, ready to start.

Now, that’s MY list.
Make yours to fit YOUR wishes.

A wonderful papercutting pattern, found on Pinterest.
Artist Unknown

Let’s look at some ideas that might be on your list.

 A vintage paper doll

Start looking at free/vintage paper dolls that you can print.
Decide if you want to give uncut,
or if you want to cut out and mount on sturdy card stock
(like cereal boxes!).
If you cut them out you can add all sorts of embellishments!


Gingerbread House found on Pinterest

Start looking at different gingerbread houses.
There are a ton of them out there.
Sketch out some ideas for your gingerbread creation.


Posted on Pinterest by OhMyFiesta

Why not start making a table centerpiece featuring
this simple sleigh pattern?
You could use heavy card stock, stiff poster board,
a piece of foam core, balsa wood...
Resize on your computer as desired.
Fill it with Christmas candies,
silk florals and greenery,
shiny Christmas ball ornaments,
or....?!
Then, if you like how it turns out,
make a few more to give as gifts!


All iris folded cards found on Pinterest.

If you challenge yourself to make 5 handmade cards
each month, starting now,
You will have 60 cards finished for Christmas 2020!

FYI iris folding makes up very quickly
with stunning results!


Here are a couple of different sleigh patterns for you,
one to cut and frame and one to print and cut.
Apologies, but artist credit is in Russian I think.


Posted on Pinterest by Knick Of Time

Unknown artist


Unknown artist

Another simple papercutting pattern, 
you could use as a Christmas card front, or frame and hang.
And
A fun iris folding snowflake pattern.

Hand painted card by Sharon Krohn

Well, I do hope you feel inspired!

You know,
Christmas is not meant to be a one day affair,
But an everyday way of living.
Enjoy!

‘Til next time,
inkspired

Truth: (usually experienced before coffee and/or 10 am)
Before taking your morning multi-vitamins,
make sure you are grabbing the correct cup.
Hot coffee is not meant to gulp down pills.
Also
there is no need to ‘blow’ on your cup of water
to help cool it down.

Kaleidoscope by inkspired 

Friday, March 22, 2013

Easy Easter pretties and activities

EASTER!!

the tradition of egg coloring, www.dailymail.co.uk

While we may not all do 'production' Easter activities, most of us like to do a little bit of something special.

Here are a few ideas!


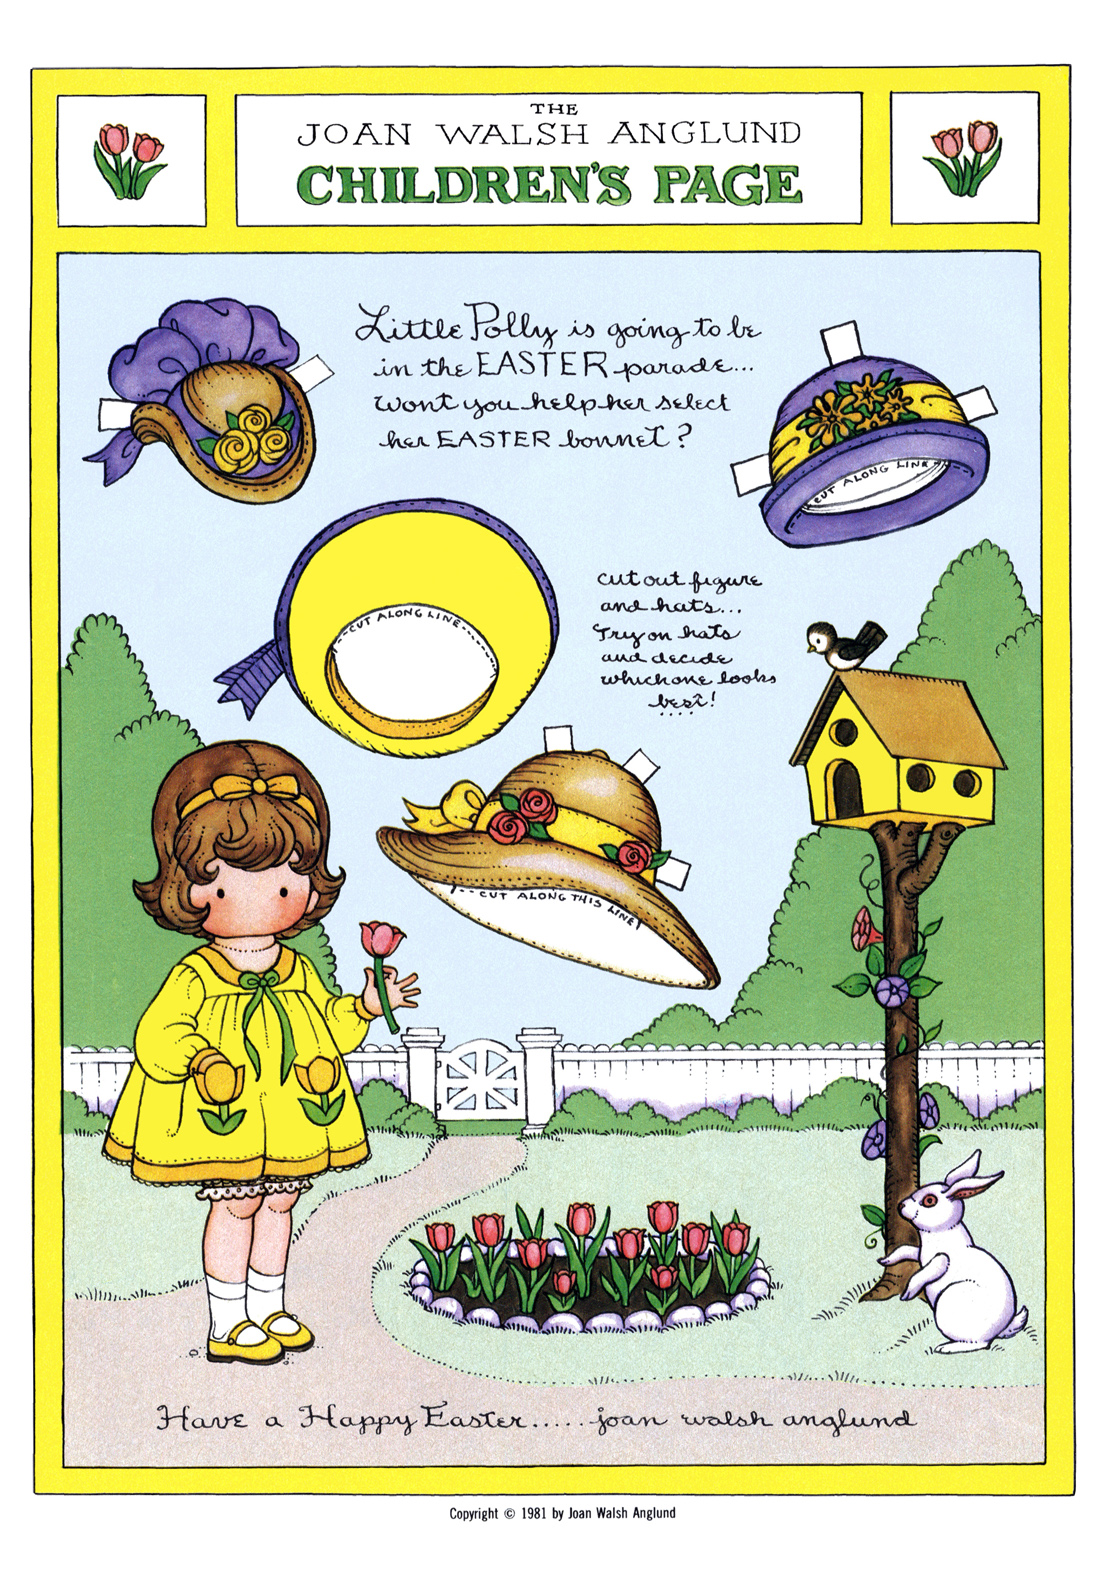
Joan Walsh Anglund Easter paper doll

Here she is with no background. Have your kids color their own scene to have her play in front of.


For an afternoon craft, give them sequins, stickers, buttons, little silk flowers, glitter glue, fancy sparkle gel pens, ribbons, etc. to decorate her hats! Be sure they have extra plain paper to create their own hats for Polly.


pattern removed at the request of bergkaarten


Iris folding pattern by www.bergkaarten.nl

Please note - personal use only. That means you can make the design and send it to friends and family, but you may not make the design and sell the card!

Here are a couple more iris folding patterns for you -
these are all from various paper crafters, found on the irisfoldinggroup, yahoo.


Wouldn't these baskets and flower pot look pretty with handmade yoyo flowers glued in them, as flowers?
Or even punched paper flowers, with a little seed bead glued as the center?


vintage Strawberry Shortcake paper doll card for a grandchild


www.sheknows.com

I thought this was a great centerpiece idea for a holiday table, where you don't want to be craning necks to look over a tall floral arrangement!
It is a simple white ceramic relish dish. I bet you could find these at World Market, Pier 1, etc.

Nope, I don't know how she made her eggs. I suggest you check out her site and see if she has directions, or check out my previous blogs about decorating Easter eggs.


coloring pages courtesy Dover Books

Be a good 'neighbor' and bring along a few sheets of appropriate coloring pages and some crayons in a snack baggie when you go to church. Many churches do not have 'children's church' during special holidays, such as Easter. 
No matter how much of an 'angel' your young child (or someone else's child) is, they will get restless. That's the time to bring out the pages and crayons!

Pet peeve:
Don't hand out crayons and activities at the beginning of church. I firmly believe that all ages of children can participate in singing and prayer. Encourage them to listen to prayer requests so that they may learn how to pray for others.

It's when they need to be quiet, such as during a sermon or special music or offertory that having a quiet activity is the right thing to do! 

:0)


Setting a pretty holiday table?
Here are some ideas that  you can actually do, and not devote 8 days of prep!


VeraKratochvil, www.publicdomainpictures.net

I'm not sure what kind of flower is on this egg. It may be a candy egg using a chocolate mold. 
What I like is:
Put some sheet moss or fake green grass or green shreds - whatever you have, in a flower pot, or on a plate. A serving platter would be perfect. Nestle open silk flowers such as daisies or wide, open roses into the 'grass'. 
Take your hard boiled eggs - just plain white looks terrific - and hot glue on another silk flower. Have some extra punched paper flowers? They would look really pretty too. You don't need more than one flower per egg.
Place in larger silk flower. I would try to just nestle them in and skip the glue.
Simple.
Quick.
Easy.

Here's another:


www.herbsociety-stu.org

First, the simple part:
Take your dyed Easter eggs and put them on a deviled egg plate.
Done!

Fancy it up? 
Put a ceramic figurine in the center, as shown in the photo.
Don't have one? Have your kids make a paper bunny, or use pom poms, or chenille pipes - whatever you have. Keep it simple.

Have a bit more time?
Tuck in between the eggs little silk flowers to fill in the 'gaps'. If you live in an area where spring flowers are starting to peek, by all means send the kids out to pick violets or johnny-jump-ups, etc. right before the meal, when they are restless to EAT anyway!
Add some fresh blades of grass, or some tiny greenery. Fresh or fake, either will look terrific!

Super fast idea?
Skip the dyed eggs and just put in a mix of white and brown eggs, then do the flower/grass thing.


Another quick and easy, yet very pretty table decoration idea:


Here I have a pot of tulips that came from the grocery store in this pretty green paper, placed on a vintage doily that my grandmother made. Around it I placed some of my vintage tea cups that I collect. The bookmark is an all time favorite of a lion and a lamb. 

a Jan Brett coloring page, www.janbrett.com


Here is an idea from Martha Stewart. If you have never checked out her web site, you are missing out. The woman is bonzai crazy creative!


A simple arrangement of egg cups and seasonal fresh flowers. Place some marbles or buttons in the bottoms of the cups to hold flowers in place and help prevent 'tipping over'.

Well, that's it for today. I always have more ideas than I have time to share!
See you soon!


inkspired
www.inkspired.etsy.com
www.collagepaperpainting.etsy.com
and on pinterest - 
kkloberdans

"Going to Church Hat"
original Collage Art Doll by inkspired
www.collagepaperpainting.etsy.com

Sunday, May 8, 2011

Iris Folding Tutorial

Bueno!
An iris folded hummingbird and flower.

Iris Folding is a very simple art that involves an opening in a card, such as the flower or the hummingbird above, and then folding scraps of paper, wrapping paper, envelope linings, ribbon or foil to 'fill' in the larger open area.
Talk about great recycling! Our mountains of paper trash are overwhelming us. Surely there is more that we can do to reduce it?
Well, iris folding is one small way I can help - and so can you!

Here are some visual directions for you, from origami resource center:


Here is a simple pumpkin pattern that I will walk you through:

Card by inkspired

First, Trace the main shape onto a scrap piece of paper (I use sheets from our printer that I have printed incorrectly...upside down, missing a paragraph, etc.)

Lay the tracing over a piece of cardstock. This needs to be a sturdy piece of cardstock, not some of the flimsier ones.

Tip: To hold in place you can use blue painting tape (it has a low tack) or take a piece of Scotch tape. Tear off a small strip, and stick it to your shirt or your jeans. Peel off, and use this to hold the tracing in place. By sticking it to your shirt first, you have added just enough lint to make it still sticky, but not too much that it would tear your paper. Great hint you can use in many crafts!

Cut out the inner shape. You need to use a sharp Xacto blade for this. No cuts into the rest of the cardstock, please!
Here are some photos to help us along, even though they show a triangle pattern, the method is identical:

Tip: You can use any die cut machine and die that has a big 'hole' shape, such as an apple, or circle. This way you do not have to cut out the inner card, the die machine does it for you!
UPDATE: I am experimenting with my Cricut Explore Air2 machine also!
     #2: Check out your local scrapbooking store. Many have machines that you can use free, or pay a small fee to use for a set amount of time. Our local Archiver's has their's for free. They do ask you to purchase your paper there, which is very reasonable to me. Look for the discounted cardstock!!

Prepare your strips of paper. Cut them about 1" wide, and varying lengths to start with.  Just cut a bunch! Fold them in half, long side.

Choose 3 different colors; mixing in patterns is just fine!

Sandwich: 1) pattern face up
                  2) cardstock with aperture face down

Turn your cardstock over, so the back side is facing you.

Following the numbered diagram, lay down your first strip. The fold goes toward the open middle, the open sides go to the outside (cardstock) area.

Tip: As a beginner, I found it very helpful to place the pattern down first, so it would show through the 'window', and I could see exactly where to place each strip. Use the non sticky Scotch tape hint I gave.
Your strip needs to be long enough for you to put a tiny bit of tape (NOT the lint free tape!) on both ends, attaching it to your cardstock.
As you attach each strip, you will be slightly overlapping the one below it.
Pick Color #2, and do the 2nd strip.
Pick Color #3 and do the 3rd strip.
Repeat in this order, following the numbered diagram: Color 1, Color 2, Color 3.


When you are done, your piece should be lumpy! That's okay!
Turn it over and make sure you haven't left any open places. If you have, you can go back and try to cover it with the coordinating paper.
Now you layer on the trunk/stem/leaves to the front of the card.

The very center of Iris Folding is usually a piece of foil, or foiled paper.
When you are done, you look at the front and it resembles the iris of an eye, or eye of a camera.
That's where the name comes from!


To finish your piece, you need to cut a plain piece of matching cardstock and firmly attach it to the back. I like to use double stick tape all around the edges. My favorite is VivaLasVegaStamps - see the side bar for web site.

Here are some basic shapes. With your computer editing, you can make each pattern as large or as small as you want. I am also including some finished cards to inspire you!


I hope this has shown you that even though the finished cards look very complicated, the actual making iris folded cards is very simple.
I find this a relaxing craft to do while watching tv or listening to music.


Here are some beautiful finished iris folded cards:


Here is a great resource for you:   http://www.circleofcrafters.com/irisfolding/

I do hope you try one - once you see how easy iris folding is, you will want to make more!  I belong to a yahoo group that is very supportive, and tons of free patterns you can use: irisfolding @ yahoogroups.


I also Google Images with the words
"iris folding".
Many many ideas and patterns and samples out there!


I hope you have enjoyed this little tutorial.
Have a super super day!


inkspired