Showing posts with label inkspired. Show all posts

Sunday, December 24, 2023

Merry? Christmas


I recently shared this on my Facebook page, and thought you might like it too.

From my heart:


Recently one of my FB friends sent out a note of how this year there was no ‘Merry’. No family coming over to celebrate. No desire for decorations or fanfare of any kind.

My heart is just so saddened at the realization there are so many of us going through these feelings and hard times. I have been there myself at times.

There are 2 things i want to say. First, Christmas for me is not a sparkly, jingle-bell filled time of fun at the root. I celebrate Christmas because I have a God who loved me so much He sent his only son in the form of an infant, Jesus Christ, to become the only way I can have a relationship with my Creator. Wow. Awesome. So I approach Christmas with feelings of gratitude, thankfulness and a desire to spread this joy to others.

Second, I do like to decorate! Play special music and do special things! They don’t ‘make’ the holiday for me, but are expressions of my own joy. This time of year I can get very sad or sentimental when thinking of people I have lost. Why are they not here to celebrate with me? If I keep my eyes on the purpose of this time, it really helps me put things back in perspective.

It also urges me to reach out to others, as I realize I am not the only lonely one. I am not the only one who questions where the Merry is. Perhaps that is the key. Reach outside of yourself and see others who are lonely or alone. There is so much we can do to lift the spirits of others, and by doing these we lift our own spirits.


I do not mean go spend a bunch of money, or make yourself sing Carols or pretend that all is well, because it is not. Just reach a little outside of yourself and help make someone else’s holiday time a bit more livable. A bit more joyous. I know you will then find a bit more joy in your own life.

And it will snowball. Really! Who knows? You may even start to hum a little Christmas tune.


My sincere prayer and desire for each of you, my Facebook friends, is to have a Merry Christmas all year round.

Now go hug your mailman and tell them thanks.

Love,

Karen


Reminds me of the Star above the stable in Bethlehem


Tuesday, July 12, 2022

Mermaid Alphabet M - Z, Part II

 Hello!

One in a set of Seashell themed houses with hidden doors, flaps & more where treasures are hidden behind.A paper Seashell Estate with Lil’ Peeps & accessories.

Original by inkspired


Let’s finish our Mermaids’ Alphabet,

Part II

Letter - M

From ValeriaDrake.blogspot.com, 5/20/22


Next, the Letter - N

PerfectlyPinkParties, Etsy, owner Rachel B.

I realize this is not the best photo, but I thought her alphabet letters were so cute, with the banner and all, that I wanted to include one.


Letter - O

PalmettoEngraving, on birch wood; Etsy; owners Dennis/Nancy Solomon

If you haven’t seen my previous post, that is where you will find Mermaid-related Alphabet letters A - L.


Letter - P

Fearless Divas; Etsy, 7” x 9.5”

Letter - Q

I found this on Pinterest, who sent me to Etsy, but no further information


Next, the Letter - R

This was listed on Etsy by Jeanie Nelson as a giclee’ print.


Letter - S

This little mermaid is posted all over Pinterest with bits of info on every post!          Here is what I have pieced together - BluLine - Logotypes; 
Etsy shop Home of Letters with owner Rylee.


Letter - T

Posted on Pinterest by Belinda


Letter - U
Originally from Etsy, but no further information is available

I do wish I could have found every alphabet letter with a mermaid. However, seashells do fit well with a mermaid theme, don’t they?

Letter - V

Made with shells from Perth, west Australia
Etsy, but no further info available


This next Resin Art letter is one of my favorites -

Letter - W

Resin art by NikkisStuffNThings, Etsy, owner Nicole


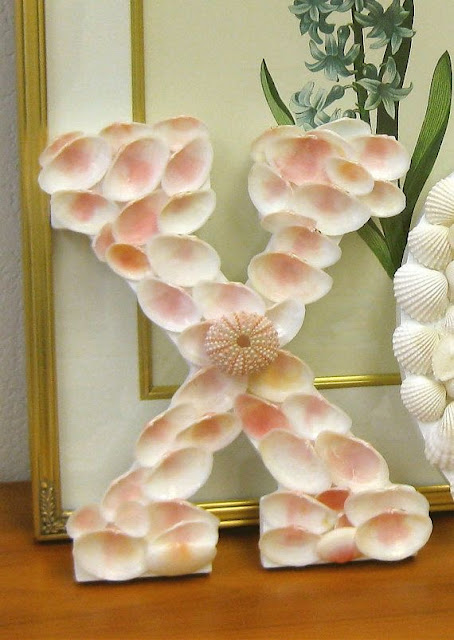
Letter - X

Etsy, no further information available


Letter - Y

Another shell creation by FearlessDivas, Etsy 

And the last one -

Letter - Z

Live Coastal, Etsy 

🎶 Now I’ve said my ABCs
Aren’t you very proud of me! 🎵


So happy we had some mermaid-time together!

‘Til next time,
Inkspired


Saturday, October 24, 2020

Last minute Halloween activities

 Welcome!

All kaleidoscopes by inkspired and KaleidoCam app

Vintage postcard

I don’t know about where you live, 

but here in Colorado, USA

we are expecting a freezing snow storm 

tomorrow. 

They’re calling it an Arctic Blast.

Perhaps you are also stuck inside due to weather.

I thought it would be fun to do some

simple last minute Halloween crafts/activities.

1924 magazine cover

I thought this easy string craft looked fun.

I used to make similar decorative balls back in the 1970’s!

Let’s Fly Away/Blog E Dicas De Viagen

These cute votive candle holders are easy, 

and most likely you can find all the supplies 

either at home or the dollar stores.

You will need:

White yarn, any thickness

Glass container with mouth large enough to place votive

Flameless votive candles

School type glue, Water

Or

Liquid Starch, water

Optional: fake spiders, various sizes

First cut longish lengths of yarn.

If making with little ones, a bit shorter is easier for them to handle. Practice and find the right size for all.

In a bowl pour starch or glue. Add less than 25% water.

Stir well.

For example, 1 Cup starch, 1/4 cup water.

Elmer’s type glue works well, and may not need any water if it is runny/thin enough.

Clean your glass container with a bit of rubbing alcohol. Dry well.

You can use clean jars, Dollar Store vases,

Baby food jars, etc.

Alecia@ChickenScratch NY


Now the messy part!

Dip pre-cut yarn into starch mixture. Be sure it is moistened throughout. Squeeze off excess liquid. Wrap glass container with soaked yarn, 

 making sure it is overlapping 

with no loose ends. 

End each piece on top of or under another piece.

Wrap as much or as little as you want. Remember for a spider web it has to have lots of ‘holes’.

Let air dry. Be patient, overnight is good.  

When dry, hot glue or Tacky Glue a fake spider on.

Put in a battery-operated flameless candle and enjoy!

Have leftover starch/glue?

No need to throw it all away.

How about we make some lacy yarn pumpkins!

One Little Project, Pinterest


For Lacy yarn Pumpkins you will need:

Colored yarn in your choice of ‘pumpkin’ shades.
Elmer’s type school glue or liquid starch
Balloons, different sizes/shapes 

First, blow up your balloons to desired size.
Tie off end.

 Next, cut longish pieces of yarn.
Have your glue or starch ready in a shallow pan.
A foil or glass pie pan works well.

Saturate a piece of yarn.
Squeeze excess off with your fingers.
Start wrapping carefully around your balloon.
Make sure you start and end each piece of yarn 
under another piece of yarn, 
so it is like a continuous long piece.

You might find it easier if you tie a string around the end of the balloon, so you have something to hold on to.
This will also be helpful for hanging when it’s time to dry.

Be sure to leave space, so your balloon is showing through.


After wrapping, hang balloons upside down over newspapers,
 or throw away pans, garbage bag, etc.
I found tying them onto a broomstick handle
that is propped horizontal between 2 chairs worked well. 
Place newspapers on floor for excess glue to drip onto.
Let dry overnight.

Time to pop the balloon and discard it!
Tightly wrap a piece of brown chenille stem around a pencil.
Use glue to stick the coil on top of the lacy pumpkin.
Wrap a green chenille/pipe cleaner around a few 
strands of pumpkin yarn, and under the brown ‘stem’.
Done!
These look great with several in a bowl or on a plate!


My next easy craft is truly EASY!

DumpaDay.com

You will need cardboard tubes, such as toilet paper inner tubes,
or paper towel tubes, wrapping paper tubes, 
you get the idea!
On your cardboard tube draw with a pencil 
some spooky eye shapes.
-Refer to photo-

Here are some more ideas for eye shapes:

Cheznounoucricri.centerblog.net

Here’s the hard part:
Carefully
Cut out shapes with a sharp pair of scissors
Or an x-acto type knife blade.
Really.
Be careful.

At this point you can paint the tube black if you wish.
Next, break a few glow-in-the-dark sticks.
Run a line of glue inside the prepared tube.
Place glow stick on glue.
Place your ‘spooky eyes’ in a few windows, 
or as part of a spooky table centerpiece.
If the weather is good,
these look stunning placed in and around bushes!
Have fun!

A few more ideas for eye shapes:


Julie Robins, Pinterest


That’s all for today!

‘Til next time,

inkspired

(My continued apologies for a messy format, text in odd sizes and places and other glitches. I am still struggling with the ‘new & improved’ blogger. Sigh.)


Vintage postcard


Truth of the day,

Usually discovered before coffee, or 10am, whichever comes first:

When feeding the dog, make sure you place the food bowl where she can reach it.

Forgetting this and leaving the bowl of food 

on the counter is...

Irritating to the dog.

Wednesday, September 23, 2020

Pressed Flowers 101

 Welcome


Today’s adventure with the new Blogger 
apparently will be:
*Why can I NOT get the format to change over to center alignment
instead of
left alignment?

*Why can I NOT assign credits to imported photos?

Well the new adventure didn’t last long as I am ALREADY FRUSTRATED.

Back to blogging-

Let’s make some beautiful things while we enjoy the beginning (no matter how brief)
of Autumn.

All kaleidoscopes by inkspired and KaleidoCam app.

I have been pressing flowers from my garden
before the early snows kill them off.
I use a microwave method using
the Microfleur kit.
I just love it!

The Microfleur basic set

It consists of 2 plastic plates, 
2 clips to hold them together,
2 squares of thin cotton fabric
and 2 thick felt pads.


You lay out your flowers similar to above photo.
Make a ‘sandwich’ & pop into your microwave.
First burst: 10-20 seconds
Second burst: 10-20 seconds


A pressed flower design. Photo by Evelyn Ruhnke

I have never had to microwave longer than that.
Take your ‘sandwich’ apart carefully.
I then place the pressed flowers on paper towels 
until I am done with all I am pressing for the day.
🌸🌻🌺
Because you are pressing in such a short time,
the colors are so bright and pretty!

From a set of notecards by VT Pressed Flowers, Etsy

Pressed flower framed art is also unique and beautiful.

Another framed arrangement by Evelyn Ruhnke

Don’t want to get that fancy?
That’s okay!
You can place your flowers between 2 sheets of plastic.
Use the sturdy plastic from the front of toy boxes,
or even from clear sheet protectors.
VERY lightly dab tiny bits of glue on flowers 
and place on 1 piece of plastic with tweezers.
Tip:
It helps if you lay out your design
first, then glue.
🍂 🌾  🥀 🍃 🌼 🍁
Place 2nd piece of plastic on top. You can dab a couple of places on the top of the flowers,
then press 2nd sheet in place.
Finish with some pretty tape all around the edges to hold everything together.
Washi tape works, or ribbon that is 1” wide.
You will have to glue the ribbon folded over the edge equally to make it look nice.

So Super Awesome, Pinterest

Or
Cut your plastic into an oval, circle, etc.
Then use a sharp sewing needle 
with the stitch set on long
and sew all around the edge.
A zigzag stitch looks pretty also.
Add ribbon hanger and place in a window. 

Herbarium Boutique, Etsy 

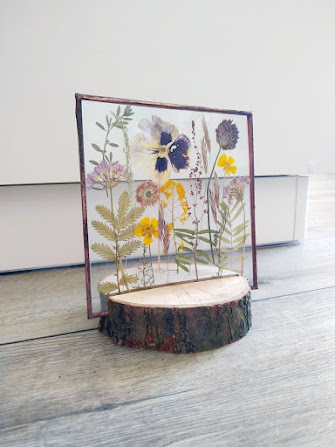
I have also used copper tape
around the edges of a glass sandwich.
The glass was leftover from smaller frames 
where I did not want to use the glass.

(Notice the simple & clever stand below?)

Another example of flowers 
displayed between panes of glass:

ForgetMeNotNature, Etsy


Let’s not forget stationery!

Found on Pinterest, but no ID.
Possibly My Humble Jumble, Etsy

Making beautiful notecards is so easy with
pressed flowers and leaves
as God through Nature does all the work for you!
Simply take cardstock,
cut and folded to your desired size,
and lay your pressed items 
in a pleasing arrangement.
Dab on glue.
Add glitter glue, paper die cuts, lace,
bits of ribbon- 
anything that pleases you,
trying to stay with flatter objects.
Happy? Glue in place with dabs of glue.
My friend S.N. uses an old cd as her palette,
and squirts a little blob of glue on it.
Then taking a toothpick she picks up
dabs of glue and glues her items.

PatsysPressedFlowers, sold on Etsy.

A gorgeous one-of-a-kind card to send!

Card by Original Garden. She has an Etsy shop.

The last pressed flower/leaf craft
I would like to share with you are
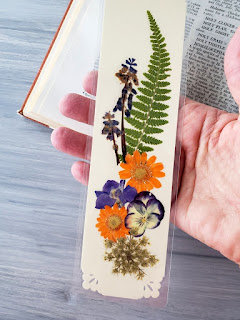
BOOKMARKS!

My Booklandia, Pinterest 

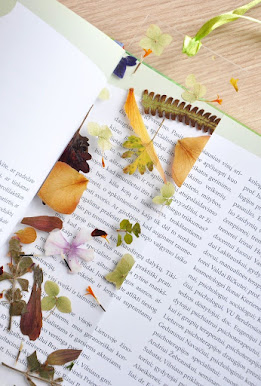
Do you have some old, falling apart books 
stuck in a corner or box somewhere?
This is a lovely way to use a few pages 
from books headed to the recyclers..


Cut pages into bookmark shape.
Back with sturdy cardstock, but nothing too thick.
Glue to pre-cut page. 
Punch a hole at the top.
Lay out your pressed flower design;
sparingly glue in place.
Brush 2-3 light coats of Mod Podge over all.
Let dry 24 hours+ in between coats.
Thread ribbon/yarn tassel through punched hole at top.
Or
Cut clear contact paper into 2 bookmark shapes,
with one being slightly larger.
Peel off backing from the first one,
and place dried flowers on the sticky part.
Carefully place sticky side down of
second slightly larger piece, 
and smooth with a brayer,
rolling pin or smooth sided bottle.
I like to do this on a thinnish shop towel,
 to help protect the pressed flowers.
Trim excess contact paper.
Punch hole in top for tassel if desired.

Brit Morin, Pinterest 

Here are some more ideas to inspire you.

My Humble Jumble, Etsy & Pinterest

Notice the stitched border:

Craft, DIY Decor, Gift, Sew and Party with Tip Junkie, Pinterest 


rose.gold.silver, Etsy and Pinterest

I hope you are able to try out the
Microfleur flower press.
(No paid endorsements, I just really like it!)
If not, get out that old telephone book
and start pressing!

‘Til next time,
inkspired

My Humble Jumble